NEW: Learning electronics? Ask your questions on the new Electronics Questions & Answers site hosted by CircuitLab.
Microcontroller Programming » Trouble Controling each LED in a multi-panel LED array project from the PC
|
March 01, 2010 by brockmjp 
|
I've constructed a three panel LED array and it works fine with the software provided in the tutorial downloads. The thing is, I want to be able to control each LED in the array from my PC, so I'm writing my own code. My idea is to have a listener (the easy part) that will send a string of 300 1's and 0's to the master mcu which will parse that, sending 100 to each of the slaves. The slaves would parse the 100 into 5 sets of 20 (Row0 to Row4). Then the slave would drive the pins depending on the sequence for each row (i.e. 1 = 'on', 0 = 'off'). This way I can change fonts or create effects on the fly without having to re-program the mcus. Sounds simple right? I'm starting with the code for the slaves, but I seem to be having difficulty accessing elements of a char array from within a for loop. The problem only seems to happen in the micro controller, as I'm able to run a similar piece of code on a Linux machine and get the expected result (with print statements substituted for pin changes). The example below shows how I would loop through the first 20 characters (Row0) and set the column wires high for the odd numbered LED columns (while Row0 is set low) for each LED with a '1' in that position. If I can get this to work, it should be easy to go back and reverse the voltage and do the even columns, and then do each of the other rows the same way (resetting all the drivers between each pass). First, here is the code that works when compiled in Linux with cc compiler. Then I'll show the code for the micro controller that fails and where I think the problem is. This gives the expected result for the odd numbered columns (note the column numbers are zero based, that's why I call them odd i.e. column 2 is the third column): However, when I load the following code on the mcu, the LEDs do not light up. I got tired of plugging in all the wires from a panel, so I have a small test setup of LEDs consisting of the first four LEDs of Row0. The funny thing is that I know that the loop is working and I know that the conditional statements work except for the one that checks the value of x[i]. I know this, because if I change the i in just that statement to one of: 0,2,4,6,8,12,16 or 18, then the first and third LEDs will be on. Any other number and all are off. This is just what I would expect if the value of i ( just for the if x[i] == '1' statement ) was any of those numbers, but it doesn't work if I use x[i] in the loop. Furthermore, if I remove the loop and set i = 0 then the first LED is on, or if I set i = 2 then the third LED is on as expected. So the loop works, and the x[i] == '1' conditional works, but they DON'T work together in the mcu while they DO work together just fine on my Linux machine!!!!! I've exhausted my Google searches trying to figure this out. If anyone could enlighten me on how to get this loop to work, I would be grateful. I would be happy to share the final code (including the listener) on the forum when/if I ever get it figured out. Thanks for your time and consideration, Joel |
|---|---|
|
March 01, 2010 by bretm 
|
With the default makefile that comes with most of the projects, array initializers don't get included in the .hex file that is produced. You either need to include the ".data" section of the code by adding "-j .data" to the avr-objcopy command, or you need to define your array using the PROGMEM macro so that the array initializer values are include in program memory instead of data memory. See this for an example. |
|
March 01, 2010 by hevans (NerdKits Staff) 
|
Hi Brockmjp, Bretm is right. You are getting the unexpected behaviour because static initialization of arrays is a bit tricky when the program and RAM memory spaces are different. There is a pretty good discussion about it in this forum thread Humberto |
|
March 02, 2010 by brockmjp
|
Thanks for the replies. I tried including "-j .data" to the avr-objcopy command and it worked. I guess I don't quite understand initialization of arrays. The observations I made in my first post suggest that each element was present in array x, since I was able to access any element as long as I set a static value for i. It just didn't work in the loop, so I thought it might be some kind of scope issue. Anyway, I'm happy its working, and setting the string in the code is just for development purposes. -Joel |
|
March 27, 2010 by brockmjp
|
This has been a great learning experience. I can now send a string of 1's and 0's to create any pattern I want on the marquee. This is obviously useful for creating graphics on the marquee, but it also allows you to animate the marquee arbitrarily (e.g. new fonts, special effects etc.) from the pc without having to reprogram the master mcu. No changes to the slave program were necessary, I just made a few modifications to the ledarray_master.c program. I first moved the do_scrolling_display() call into the while loop of the main block. Then I added a line below that to call my new function do_pixel_pattern(). There is already a switch built into the do_scrolling_display function so that when an 'a' character is received, the function returns to the while loop in main and then enters the do_pixel_pattern function. I put a similar switch in the do_pixel_pattern triggered by a 'b' character, so I can go back to the default scrolling mode. Since the do_scrolling_display function is the default, you don't have to change the way you send data to the marquee if you want to keep using the built in scrolling. To use the new function, you send an 'a' to switch modes, and then send a string of 1's and 0's representing each row in the marquee. I have a three panel marquee, so the first sixty characters in the string are row0, the next sixty are row1, etc. To switch back to scrolling mode, send a 'b'. Here are the modifications to the original ledarray_master.c program: If you try this out on your own marquee, here is a simple test: Here is Perl script (Windows) that will do the test above and then print a smiley face on the left side of the marquee (5 row, 20 column, 3 panel). Check your COM port number and edit if necessary: |
|
March 28, 2010 by hevans (NerdKits Staff)
|
Hi brockmjp, I'm glad you have your project working, and that you learned a lot in the process. We would love to see some pictures of it working if you have them! Humberto |
|
April 04, 2010 by brockmjp
|
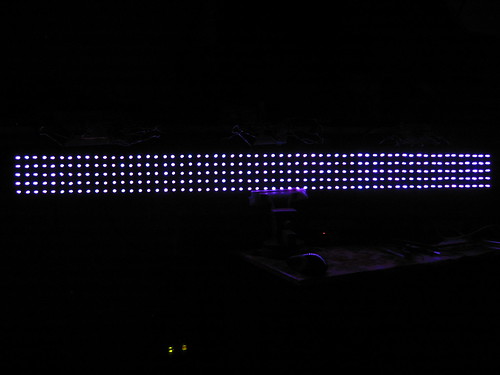
A few days after Halloween, I went out to Walmart to see what I could pick up for 75% off. I bought a bunch of boxes of purple LED lights. I didn't know what I was going to do with them at the time, but I figured I would think of something. Then I stumbled on Rick_S's LED marquee design using Xmas LEDs which are pretty much the same thing. I basically followed Rick's instructions to construct the marquee except I used a full length piece of laminate flooring (free from Craig's list) and drilled 300 holes instead of 120. The wire stripping and soldering was a pretty big job. One thing that surprised me when I completed this project was the fact that no external power is needed except for what I get from the USB cable. The first picture shows how I can turn on all 300 LEDs. No battery, no walwart, no voltage regulator, just the USB power. I even tried it with a wireless USB hub (iogear) and that works too.
The next picture shows the smiley face I referred to in my last post. Not a very good smiley face, but 5 rows is kinda limiting.
|
Please log in to post a reply.
|
Did you know that Morse code is a compact way to transmit human-readable text over binary channels? Learn more...
|


Copyright © 2013 by NerdKits, L.L.C.