iPhone-Controlled R/C Car
|
Demo video
|
|
How-to video
|

The Big Idea
Layering different simple systems together to perform one complex task is really at the heart of what engineering is all about. In this project we show how it is possible to utilize different technologies and piece them together to controll an inxpensive RC Car, with an iPhone. With the NerdKit serving as the bridge between the computer and the R/C Car, it is as an example of how useful microcontrollers can be when they serve as the glue that makes complex systems work together, and how with an understanding of microcontrollers a neat system like this one is achievable as a Do-It-Yourself weekend project.
Parts List
Beyond the USB NerdKit, we need a few extra parts for this project.
| Photo | Part | Quantity | Description |
|---|---|---|---|
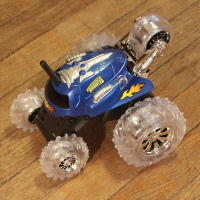 |
"Thunder Tumbler" remote control car | 1 | A colorful, simple R/C car. It's seems pretty tough and it's inexpensive enough to experiment with. |
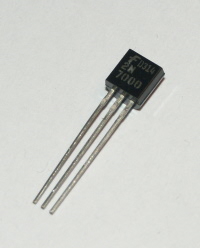 |
Small n-channel MOSFET, 2N7000 | 4 | We need four transistors to act as switches. Each one controls one of the four channels: left forward, left backward, right forward, right backward. As we discussed the source, gate, and drain terminals in the NerdKits Guide, I'll point them out here. With the 2N7000 set as in the picture here, with leads down and labeling visible, the terminals are source, gate, drain from left to right. As of 4/07/2009, four 2N7000s are now included with the USB NerdKit! |
Step 1: Open up the controller, and drill a hole for the wires
If you take out the four screws on the back side of the remote control, you'll be able to take the top half of the plastic case off, and this is basically what you'll see (with the right joystick removed):
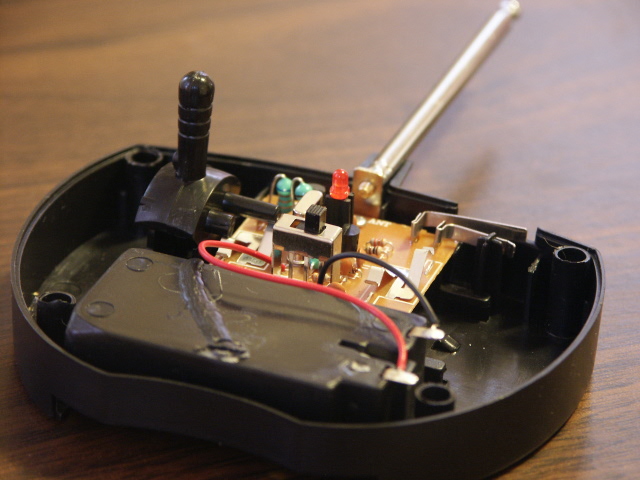
We're going to solder six wires in total inside the remote control, and we have to bring those wires out to the breadboard, so drill a small hole in the back of the remote control that's big enough to get those six wires through.
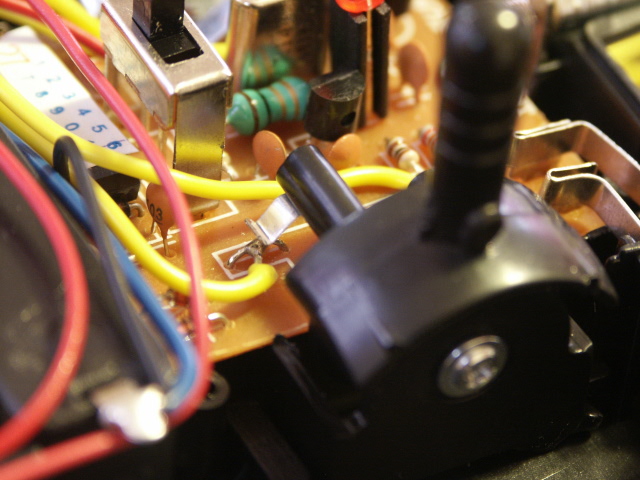
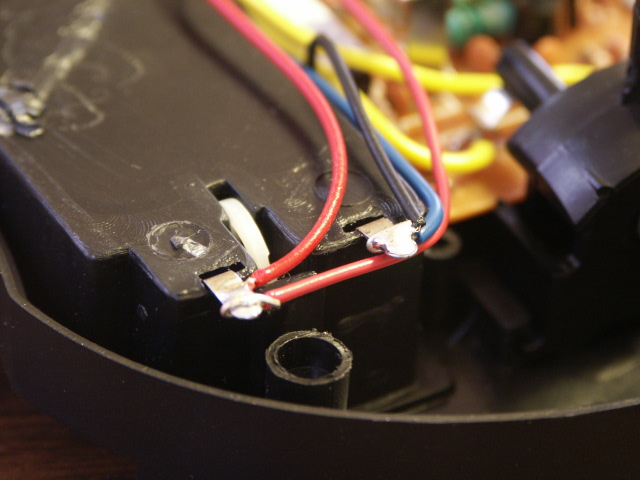
Step 2: Solder to the four control nodes, and the two battery leads
As described in the video, there are four little wire loops sitting underneath the folded metal springs. These control the four possible movements. Solder a wire to each one, and if you still want to be able to use the remote control without the NerdKit in the loop, then be extra careful not to obstruct the normal movement of the joysticks.
Also, attach wires onto the 9V battery holder inside the remote control, so that the NerdKit microcontroller can run off the same power source.
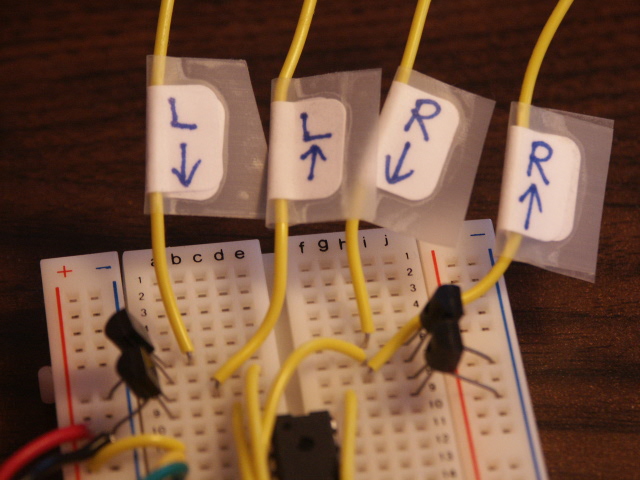
Step 3: Build the circuit
The circuit you have to build is really quite simple, as it just uses the four 2N7000 transistors as switches between the remote control wires and ground:

You can see that we easily wired it up at the top of our NerdKits breadboard:
Step 4: Compile and upload the software to the microcontroller
Download the source code, and then make a new NerdKits project just like you would any other -- starting from a template project on the included CD and modifying the Makefile.
Step 5: The Web Server
We need to be running a web server on the computer for the iPhone to be able to communicate with the system. Download and install the Apache Webserver.
Once that is installed, download the Web Code for this project. It contains three files, car.php and newVector.php should be placed in a web accessible folder (these are the web scripts). On Linux, Apache uses /var/www by default. On Windows, you have to check the configuration to see where the root web folder is. The third file, pyCar.py should be placed somewhere in your hard drive.
Now we have to create the named pipe that is going to allow newVector.php and pyCar.py to communiate with each other. As we said in the video, and you can see from the code, newVector.php treats the named pipe just like a file that it writes strings to. The Python script opens the pipe just like a file and reads it, then sends the information to the NerdKit. On Linux, to make the named pipe, use the command mkfifo my_pipe . This will create the pipe called my_pipe. You have to make sure the pipe is readable and writable by all users so that the apache process can write to it.
Now you have to edit the files newVector.php, and pyCar.py to point to read and write from the named pipe you just created. Finding the lines you have to change is left as an exercise to the reader.
Start the web server and use your iPhone to connect to the page. You will have to use the web browser to go to http://{your_ip_address}/car.php Move your finger around on the screen, and obeserve what happens.
Now its time to hook up the NerdKit, run the python script, and have some fun!
Frequently Asked Questions
Welcome fellow electronics enthusiasts from Hack a Day
More Videos and Projects!
Take a look at more videos and microcontroller projects!
Comments
|
Did you know that you can read diagnostic data from some cars with a NerdKit? Learn more...
|


Copyright © 2013 by NerdKits, L.L.C.