NEW: Learning electronics? Ask your questions on the new Electronics Questions & Answers site hosted by CircuitLab.
Project Help and Ideas » Video of Completed 40 LED Heart Project
|
February 14, 2010 by Phrank916 |
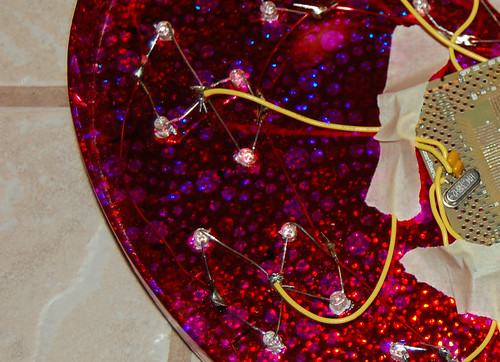
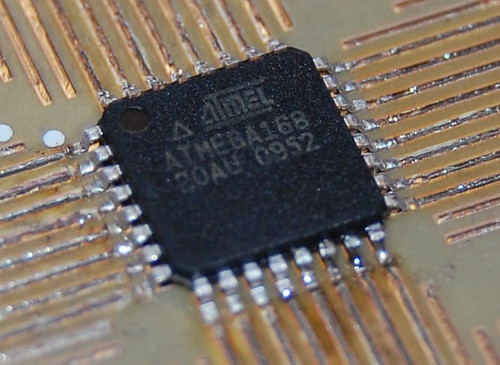
I just thought y'all might want to see my awesome handiwork! HAHA, just kidding! It was a lot of work, but a ton of fun! One thing that was definitely reinforced to me during this project: Flux is your BEST FRIEND. I had 10 different joints that had 4 LED legs and one stranded wire that had to be "blob-soldered" together. Adding paste flux to those joints helped immensely with proper wetting and flow of the solder. Here is a quick and dirty diagram of how the LEDs and wiring were arranged . And yes, I know those aren't proper schematic symbols, hehe, I did it paint goshdarnit! I also made use of 24 gauge 'magnet wire' for the row wires that go all the way around the outside and inside. Magnet wire is used for winding coils. It is insulated, but the insulation is very thin laminate-like material and when enough heat is applied to it in the form of a hot solder blob, the insulation just vaporizes and makes good contact at that junction. This made it very easy to simply thread the row wires through the two criss-crossed LED legs all the way around, and then just apply solder to the junctions. I plan to make this more permanent with a smaller TQFP package MCU and a 2x2 Schmartboard breakout. Everything will then be mounted up under the lid and then most likely hidden with another piece of cardboard that just fits inside the lid. I had to do this stupid temporary prototype with the breadboard though because I wanted to give it to my wife today and I'm still waiting for my good Weller soldering iron to be delivered, which heats up hot enough (800F) for the TQFP mounting onto the Schmartboard. So, here is the final code if you want to take a look. Enjoy! Cheers, |
|---|---|
|
February 14, 2010 by Solorbob |
Looks good Ted. Great job. Shawn |
|
February 15, 2010 by Rick_S 
|
Looks nice. And you made your deadline!! Did she like it?? Which Weller are you getting?? Rick |
|
February 15, 2010 by Phrank916 |
Thanks Shawn and Rick! Yeah she was very excited when she saw it, I think she was mostly impressed with how much time and effort went into it. She doesn't really understand the coding and electronics stuff, but she saw me staying up almost every night this last week plugging away out at the workbench. I also created anticipation because I was always telling her not to go snooping around my bench and towards the end of the project I had it out on the bench covered with a cloth to hide it, so I know she was curious. I have been trying to get a good soldering iron for a month and a half now; from eBay I ordered a EC2001 power station separate, and at about the same time I ordered an EC1503 iron. Well the power station came, but the iron was another story. I never heard anything from the seller, and emails and messages went completely unanswered. To make a long story short, I had to open a case with eBay and ended up getting a full refund from eBay CS. So, last Monday I ordered an EC1301 from a much more reputable seller with an actual storefront, etc. I was hoping to have received it by Saturday, but no luck. They sat on it until Wednesday to send it, and it went out priority mail which can take a bit. HAHA so yeah, sorry to blabber on venting about my travails. To answer your question, I'm getting the EC1301. Also have a couple replacement tips on the way. Should be awesome, and after a month and a half of waiting and almost a month of staring at the power station on my bench I'm VERY excited. Ted |
|
February 15, 2010 by mcai8sh4 
|
Aw Ted, I hope that earned you great points with the missus - Really nice work. Better than my Valentine present of working and not taking her out! Well done mate - I bet you feel really proud (and so you should!). -Steve |
|
February 19, 2010 by Phrank916 |
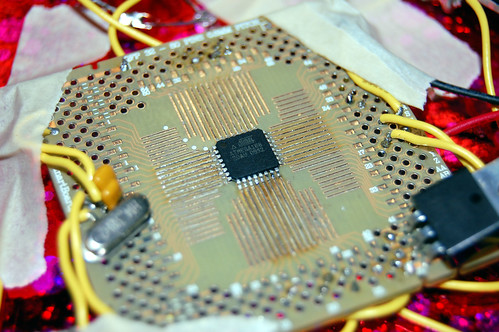
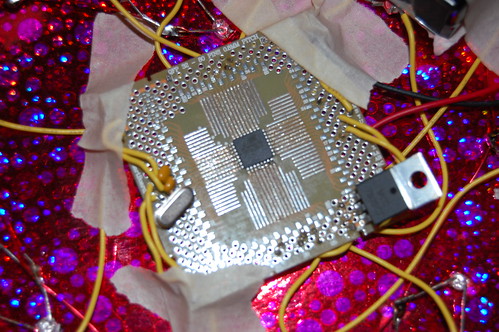
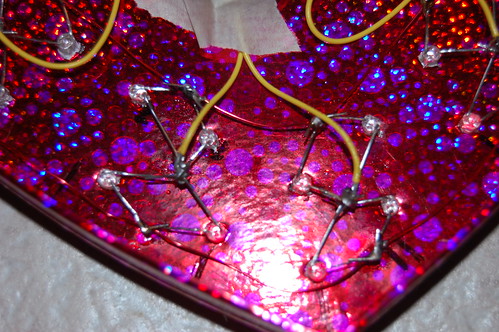
As I mentioned above, the heart wasn't completed when I gave it to my wife on Valentine's day, just "functional". So I took it back from her and told her I was going to make it better. After getting my new top-o'-the-line soldering iron yesterday, I couldn't wait to finish the project. The new soldering iron was required because the board I was using to mount the surface mount MCU requires a temp of between 750-800° F. I don't think my old $9 fixed temp Sparkfun special was getting above 650° F. I won't go into why it requires that amount of heat, but if you're interested, google "schmartboard". So, after getting the chip actually soldered to the board, I was able to use my pocket AVR programmer to set the fuses properly with AVRDUDE, and then I looked at the Makefile and checked out the line in there for AVRDUDE to upload to the nerdkit. I knew my ISP wouldn't require the baud rate or the com port, so I took out those switches. I also had to modify the -c switch for my programmer, but everything else was the same. And that was it! The hex file uploaded to the chip. Next, I was able to trim down the long yellow wires you can see in the video above, and thread them under the board to solder them to their respective points. The last couple were fun because toward the end I couldn't flip the board over anymore to stick the little wires through the holes for soldering. Once I got all the wires resoldered, I clipped in the 9 volt battery and everything WORKED. I was amazed. The intricacy required to solder that board had me very concerned that there would be a bad connection somewhere or bridged solder points, etc. I know the masking tape is super ugly, but now that it's all up under the lid, my wife can put stuff in it or put it on it's side for display without worrying that the breadboard is gonna fall out. Oh and by the way, It's running at 14.318Mhz with a crystal I harvested off an old motherboard. Here are a few pics, if you'd like to see them in higher resolution, check out my Flickr Photostream:
|
Please log in to post a reply.
|
Did you know that Morse code is a compact way to transmit human-readable text over binary channels? Learn more...
|


Copyright © 2013 by NerdKits, L.L.C.
