NEW: Learning electronics? Ask your questions on the new Electronics Questions & Answers site hosted by CircuitLab.
Microcontroller Programming » Boodloader and STK500, please help!
|
July 20, 2009 by bmgoau |
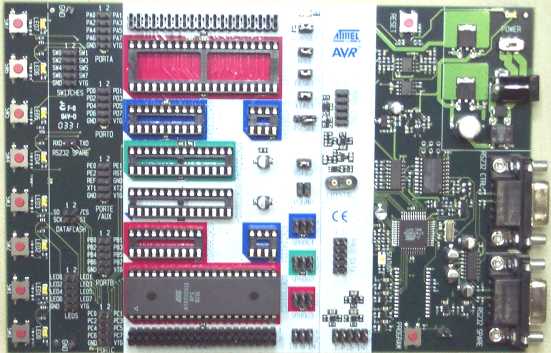
Hey everyone, having some trouble getting the bootloader (foodloader.hex) supplied on the CD onto a new Atmega168 chip using a STK500 development board and avrdude. This is what my development board looks like:
Im using nerdkits supplied makefile with some slight changes: However when i run the make file this is the output I have the crystal in its slot, i have the OSCSEL jumper on pins 2 and 3, i have the programming ribbon cable on the green port (SPROG2). I have also tried having my com cable connected to both com ports on the stk500 and have tried a variation of avrdud flags including: Im not sure what im missing please help |
|---|---|
|
July 20, 2009 by bmgoau |
UPDATE Ok i got it working (but not quite entirely), the trick was to use "STK500v2" in the flags line It ran through its flashing and verification processes, and everything went correctly, and reported successful HOWEVER when i put the fresh chip into my breadboard, and flick the programming switch UP and turn on the power and then finally attempt to load on a program using the given make files: for example tempsensor i get this output after waiting around a minute... Other people had this problem when they didn't have the programming switch in the "up" position. But after rewiring everything i am still having this problem. |
|
July 20, 2009 by bmgoau |
I realise now this should be in the "Support" forum, could an admin or mod please move this thread there? |
|
July 21, 2009 by bmgoau |
update I finally got everything working. There was a mistake in nerdkits given makefile for loading the boot loader. the original included on my cd had which set the V_BOT to 2.7V (brown out detection) Since this is lower then the 5V the nerdkits runs at it ment the chip wouldnt work. The line should actually be: such that brown out detection is disabled my final makefile looks like this It was a hard fought battle getting here, and im sure all this was obvious to someone else, but as a beginner i have learned a lot working out my own problem. I hope this thread helps someone in a similar position. |
|
July 21, 2009 by abenaki |
bmgoau posted "which set the V_BOT to 2.7V (brown out detection) Since this is lower then the 5V the nerdkits runs at it ment the chip wouldnt work." That is strange, I thought that a brown out detection level was the point that the device would shut itself down. As long as the supply voltage was above 2.7V (and you mention that you are running at 5V), the chip should be happy. I am glad you got this running. I too am getting prepared to program a new part and also have a STK500 so I was pleased to see your post. I was planning on skipping the bootloader and just programming the code for the sound level project. It is my first time in quite a while programming with the STK500 and I am rooting around the NerdKit site trying to figure out how to do it. What platform are you using? Did you have any difficulties setting up the directories so that AVR Studio 4 finds everything? |
|
July 22, 2009 by bmgoau |
You could be right about the brown out detection level. All i know is that changing that to disable brown out detection fixed the problem. I considered what you said, and using a multimeter i can confirm that 5v is coming out of my regulator and into the chip. Per your questions: The reason i was trying to get the bootloader onto a fresh chip was so that i could use the avrdude make files included in the nerdkit projects (basically i want to make more nerdkits at will :P ). Importing those projects into AVR Studio at the time seemed like an added layer of difficulty as you mentioned, getting all the directories working properly for the libraries and such. Im sure its just a matter of setting up a project correctly, and editing the code to look in the right place for the libraries, but i felt more comfortable with using the included method. In the long run i plan to use AVR Studio for my own projects, and have already made some very simple programs using it which have loaded and run completely fine on the ATmega168. Heres some tips for using it with the STK500: The atmega168 needs to go into the green port on the development board. Also make sure the programming ribbon cable is on its respective green port. If you're using a custom frequency crystal, put this in the crystal port and set OSCSEL to bridge pins 2 and 3. Alternatively AVR Studio and the STK500 allow a software frequency to be used, which is actually the default and works fine. If you're using the nerdkits libraries to support your projects, make sure you set the fuses correctly, particularly the frequency clock fuse (or serial communication and a whole lot of stuff wont work correctly). The fuses i used are: |
|
July 22, 2009 by abenaki |
Thanks for the reply and tips which reinforce what I have been researching. Its nice to have some feedback. I hope to be posting some pictures of my NerdKit AVR projects in the near future. |
Please log in to post a reply.
|
Did you know that an analog comparator can tell when one voltage input crosses another? Learn more...
|


Copyright © 2013 by NerdKits, L.L.C.